
Thursday, April 29, 2010
New hair!!
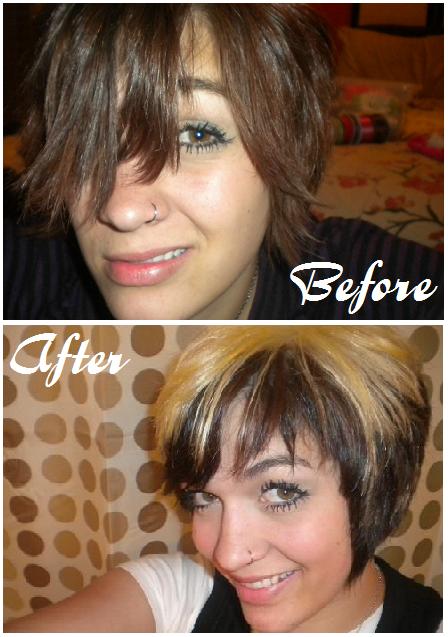
I've been feeling so "blah" lately and I thought a new hair-do would snap me out of it! I went to the fabulous Kerry Leonnig and look what she did!! I'm so happy with it! It's exactly what I needed/wanted...so fun!
Sunday, April 25, 2010
Outside trim and garage door - Painted!
When we moved into our house over 2 years ago it was painted PEACH...along with the trim, garage door, front door and everything else! Not only was our house painted this way, but so was every single other home in our neighborhood. I've never liked it and last week I finally got my butt in gear and made some changes.
We didn't have the time (or money) to repaint the entire exterior so I painted the trim and garage door white. It took much more time then I thought it would. It took about 20 hours, lots of sweating, several bad sunburns and a red ant attack. But after all that work I have to say I would do it all again because I LOVE the way it turned out. The total cost of this project $48. I used a basic exterior paint by Olympic in bright white. The trim took 2 coats and for the garage door I did 1 coat of primer and 3 coats of paint. Here are the before and after pictures:
BEFORE

AFTER (added new front sconces and house numbers)

And maybe you can help me with this! I painted the trim around our front door white as well. I was going to paint the entire door white but I think it would be more fun to do a color! I've always wanted a red door but I don't think red would look right with the color of our stucco. I've had several people suggest black and a few suggest green. So...what do you think I should do?

Oh! And we just bought all new brushed silver door knobs for the entire house (including the front door) to replace the old, nasty 20 year old brass ones!
We didn't have the time (or money) to repaint the entire exterior so I painted the trim and garage door white. It took much more time then I thought it would. It took about 20 hours, lots of sweating, several bad sunburns and a red ant attack. But after all that work I have to say I would do it all again because I LOVE the way it turned out. The total cost of this project $48. I used a basic exterior paint by Olympic in bright white. The trim took 2 coats and for the garage door I did 1 coat of primer and 3 coats of paint. Here are the before and after pictures:
BEFORE

AFTER (added new front sconces and house numbers)

And maybe you can help me with this! I painted the trim around our front door white as well. I was going to paint the entire door white but I think it would be more fun to do a color! I've always wanted a red door but I don't think red would look right with the color of our stucco. I've had several people suggest black and a few suggest green. So...what do you think I should do?

Friday, April 23, 2010
Homemade Tutu
I decided a long time ago that Margot should wear a tutu on her 1st birthday...not exactly sure why, but I just pictured it every time I thought about her birthday! So I've been shopping around (mostly online) and haven't found anything that I love and that isn't super pricey. Then I thought "I could totally make one myself!!" and that's exactly what I did :)
I took a trip to Hobby Lobby and found some rolls of tulle that were 25 yards long for $2.99 each. They also had $4.99 rolls which were the same length but they were shimmery. I didn't see a need for that so I grabbed a couple of the cheaper rolls...one banana yellow and one bubblegum pink. I used an elastic headband as the waist band and it worked out great!
If you're interested in making one, here are the supplies you'll need, step-by-step instructions and photos. And if I wasn't clear on something, please feel free to ask questions!
Materials:
30-40 strips of 5.5 inch wide tulle (I made mine 2 feet long but you can make them longer or shorter depending on the length you want. You'll want to cut the tulle 2x longer then the length of tutu you want)
1 elastic headband (you could also cut and sew a piece of elastic. I just used a headband cause I already had it)
Measuring tape or ruler
Scissors
A chair (I'll explain this later)

Directions:

Place the elastic around the back of a chair. This makes it easier to work with.

Loop the tulle around the elastic and pull the ends through, making sure they are equal in length. Pull it nice and tight. This will create sort of knot at the top, keeping the tulle in place.

Continue adding the tulle, alternating colors if you're using more then one. For a fuller tutu, you can scrunch each piece close to each other. I left mine about 1/2-3/4 cm. apart while it was on the back of the chair and it came out just how I wanted...not too full and not too thin.

Once you've gone all the way around and filled up the elastic band, take it off the chair and admire your work! Mine came out a little to big for Margot so I simply cut the elastic, took off a few pieces of tulle and tied the elastic back together. Hopefully you won't have to do this with yours!

Here's the final product! I was really happy with how it turned out and I was really surprised how easy it was and only took about 20 minutes total.

I had to snap one quick picture of Margot wearing it :) It's now hanging in her closest until June 16th rolls around. Isn't she so cute??
Saturday, April 17, 2010
Blondies
Ingredients:
1 c. flour
1/2 tsp. baking powder
1/8 tsp. baking soda
1/2 tsp. salt
1/3 c. butter, melted
1 c. packed brown sugar
1 egg
1 tbsp. vanilla
1 c. chocolate chips (I used chopped Reeses Cups instead)
Directions:
Preheat over to 350 and grease and 9x9 baking dish. Sift together the flour, baking powder, baking soda and salt into a small bowl and set aside. Combine melted butter, brown sugar, egg and vanilla until smooth and creamy. Slowly add the flour mixture until well combined. Spread into the prepared pan, sprinkle chocolate chips over the top and bake for 20-25 minutes in preheated oven. Makes 9 good sized bars.

Recipe adapted from here
Notes: This was my first time making blondies and I was really happy with this recipe..I'll definitely be using it again! It was super simple to make and they were just the right consistency, texture and flavor.
Thursday, April 15, 2010
Apple Pear Crisp
Ingredients:
3 c. apples, peeled, cored and sliced (about 3 apples)
2 c. pears, peeled, cored and sliced (about 2 pears)
1/2 c. white sugar
1 1/2 tsp. flour
1/2 tsp. cinnamon
1/4 c. water
1/2 c. quick cooking oats
1/2 c. flour
1/2 c. packed brown sugar
1/8 tsp. baking powder
1/8 tsp. baking soda
1/4 c. butter or margarine, melted
Directions:
Preheat oven to 350. Place the sliced apples and pears in a medium baking dish. Mix the white sugar, 1 1/2 teaspoons flour and cinnamon together and sprinkle evenly over the apples and pears. Pour water over all. Combine the remaining 6 ingredients and crumble evenly over the mixture in the pan. Bake in the preheated oven for 45 minutes. Makes about 6 servings.

Saturday, April 10, 2010
Banana Crumb Muffins
Muffin Ingredients:
1 1/2 c. flour (I used half AP flour and half whole wheat)
1 tsp. ground cinnamon
1 tsp. baking soda
1 tsp. baking powder
1/2 tsp. salt
3 very ripe bananas, mashed
3/4 c. white sugar
1 egg, beaten
1/3 c. butter, melted (I used veg. oil instead)
Crumb Ingredients:
1/3 c. packed brown sugar
2 tbsp. AP flour
1/4 tsp. ground cinnamon
1 tbsp. cold butter
Muffin Directions:
Preheat oven to 375 and grease a muffin tin or line with muffin papers. In a large bowl, mix together flour, cinnamon, baking soda, baking powder and salt. In medium bowl, beat together bananas, sugar, egg and melted butter. Spoon batter into prepared muffin tin, filling 3/4 of the way full.
Crumb Directions:
In a small bowl, mix together all of the crumb ingredients with a fork until it resembles coarse cornmeal. Sprinkle topping over the muffin batter. Bake in the preheated oven for 18-20 minutes. Makes 12-14 muffins.

Recipe adapted from here
Notes: I've made these muffins many times and they always turn out great! This time around I made them for a bake sale for our church so I doubled the recipe...which is why there are so many muffins in the picture.
Saturday, April 3, 2010
I don't have to cook for a while!!
Yesterday my wonderful mother-in-law showed up with TEN MEALS for us! Can you believe it?? I don't think I can quite yet! My fridge and freezer are so full! With the 10 meals and leftovers, doing the math I don't think I'll have to cook for two whole weeks! Do you even know how great that feels?? No meal planning, no huge grocery shopping trips, minimal brain power...it's great! Not to mention all the money we'll save! What an enormous blessing!
And you know what's really neat? She got most of the meals from my blog. She wrote this in an email to me this morning "that time spent on your blog came back to bless you". Heck yes it has! Thank you Jackie!
So this means it'll be a while till I post new recipes (unless I do some baking...). Not that I've been very good about it anyways...my kitchen has been all torn apart and I broke my toe pretty badly so I haven't been able to cook much.
See ya!
-Chloé
Painting Kitchen Counters
I have a long to-do list for the kitchen (you can see it here). This week I finally got started...I knocked two things off the list! One was small, quick and fairly easy...I organized all the "junk" on top of my cabinets. It was becoming a storage space and looked cluttered and messy. Everything is gone besides some large cute white and red bowls! Yay!
The second thing I did was pretty major. I painted our laminate counter tops. I was super excited but also very nervous to do this. It ended up being so much easier then I had in mind and I'm very happy with the results! Here are all the steps it took, along with lots of pictures! It took a total of 2 hours and about $55 to do the whole thing.
All the supplies I used:
Dawn dish detergent
Rags
2 inch painters tape
Sandpaper
4 inch roller
Paint brush
Paint pan
Primer
Paint
Polyurethane
Here are all the steps:
Step #1 - Clear and clean the counter tops really really well!
Step #2 - Degrease the counter tops. You can buy degreaser at Lowes or Home Depot. My counters weren't too bad so I just used my Dawn dish detergent and it worked great.
 Step #3 - Sand counter tops using a 200 or 220 grit sandpaper. You don't have to take the finish off, just scuff it up a little bit to give the paint something to grab onto.Wipe the counter tops down one more time to remove any dust from the sandpaper.
Step #4 - Using painters tape, tape off the walls, sink, stove and anything your paint might get onto.
 Step #5 - Prime the counter tops. I used Zinsser 1-2-3 bulls eye water base primer. It's made specifically for smooth surfaces. It says right on the can that it's great for laminate. I did one thin, even coat of this. Allow to dry an hour before adding color.
 Step #6 - Using a water based enamel paint, paint 3 even coats. Use a paint brush to cut into all the edges and small areas, then roll the rest using a 4 inch kitchen/bathroom roller. Allow paint to dry at least 30 minutes between each coat. I used satin black from Valspar and it worked really well!
Step #7 - Using a water based polyurethane, brush evenly over the dried paint. I found that rolling the polyurethane created tiny bubbles, so I brushed the entire thing instead. Brushing DID leave visible brush strokes which I wasn't happy with at first. Everyone who's seen the counter tops said it's supposed to look like that intentionally and that they look good...so I guess that makes me feel a little better! I used 4 coats and let dry at least 3 hours between each coat.
Step #8 - Allow the polyurethane to dry and harden for 36 hours minimum before putting anything back on the counter tops.
Please keep in mind that this was only the first of many steps to renovate the kitchen so this is not the final product! Cabinets are getting new fronts and will be painted white with black hardware. We'll also be tiling a back splash and painting the walls. So the counter tops will look much better when everything is done :)
Before and After pictures


Sink area


Stove area


Small area close up


The second thing I did was pretty major. I painted our laminate counter tops. I was super excited but also very nervous to do this. It ended up being so much easier then I had in mind and I'm very happy with the results! Here are all the steps it took, along with lots of pictures! It took a total of 2 hours and about $55 to do the whole thing.
All the supplies I used:
Dawn dish detergent
Rags
2 inch painters tape
Sandpaper
4 inch roller
Paint brush
Paint pan
Primer
Paint
Polyurethane
Here are all the steps:
Step #1 - Clear and clean the counter tops really really well!
Step #2 - Degrease the counter tops. You can buy degreaser at Lowes or Home Depot. My counters weren't too bad so I just used my Dawn dish detergent and it worked great.

Step #4 - Using painters tape, tape off the walls, sink, stove and anything your paint might get onto.


Step #7 - Using a water based polyurethane, brush evenly over the dried paint. I found that rolling the polyurethane created tiny bubbles, so I brushed the entire thing instead. Brushing DID leave visible brush strokes which I wasn't happy with at first. Everyone who's seen the counter tops said it's supposed to look like that intentionally and that they look good...so I guess that makes me feel a little better! I used 4 coats and let dry at least 3 hours between each coat.
Step #8 - Allow the polyurethane to dry and harden for 36 hours minimum before putting anything back on the counter tops.
Please keep in mind that this was only the first of many steps to renovate the kitchen so this is not the final product! Cabinets are getting new fronts and will be painted white with black hardware. We'll also be tiling a back splash and painting the walls. So the counter tops will look much better when everything is done :)
Before and After pictures


Sink area


Stove area


Small area close up


Subscribe to:
Posts (Atom)